前言:
上次写了篇文章,鉴于有同志请求使用PHP发送邮件的方法,且网上此前的教程复杂麻烦,于是今日我写了本文。
特点:
在邮件中包含多个 TO、CC、BCC 和 REPLY-TO。
平台应用广泛,支持的 SMTP 服务器包括 Sendmail、qmail、Postfix、Gmail、Imail、Exchange 等等。
支持嵌入图像,附件,HTML 邮件。
可靠的强大的调试功能。
支持 SMTP 认证。
自定义邮件头。
支持 8bit、base64、binary 和 quoted-printable 编码
准备:
提示: 提取码 CN70
PHPMailer函数的安装包文件有许多,其实真正有用的只有”Exception.php””PHPMailer.php””SMTP.php”这三者。
1.下载
2.上传src文件夹于站点根目录。
3.需求:SMTP服务器、SMTP服务器端口(SSL/非SSL)、SMTP用户名及密码。以下是部分邮箱的相关内容(排序与前面的顺序相同):
网易邮箱:smtp.163.com 465/25 网易邮箱地址 网易邮箱密码
QQ邮箱(含域名邮箱):smtp.qq.com 465/587 (域名)邮箱地址 授权码
4.本人不常用网易邮箱,只使用QQ域名邮箱,请让我教大家如何取得邮箱授权码。
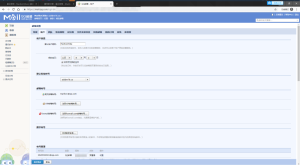
登入QQ邮箱,点击”设置”→”账户”。
![图片[1]~【教程】使用PHPMailer发送SMTP邮件~星空小站](https://www.m78.co/wp-content/uploads/2022/02/927541848-1024x564.png)
找到此栏
![图片[2]~【教程】使用PHPMailer发送SMTP邮件~星空小站](https://www.m78.co/wp-content/uploads/2022/02/3280348461.png)
点击”生成授权码”
![图片[3]~【教程】使用PHPMailer发送SMTP邮件~星空小站](https://www.m78.co/wp-content/uploads/2022/02/3847163264.png)
经过验证得到一串数据码,即为邮箱授权码。
开始:
1.上传”QQMailer.php” 邮箱配置文件
 <?php
    use PHPMailer\PHPMailer\PHPMailer;
    use PHPMailer\PHPMailer\Exception;
    use PHPMailer\PHPMailer\SMTP;

    require_once 'src/PHPMailer.php'; //函数文件路径
    require_once 'src/Exception.php'; //函数文件路径
    require_once 'src/SMTP.php'; //函数文件路径

    class QQMailer
    {
        public static $HOST = 'smtp.qq.com'; // 邮箱的服务器地址
        public static $PORT = 465; // smtp 服务器的远程服务器端口号
        public static $SMTP = 'ssl'; // 使用 ssl 加密方式登录
        public static $CHARSET = 'UTF-8'; // 设置发送的邮件的编码

        private static $USERNAME = 'test@qq.com'; // 授权登录的账号
        private static $PASSWORD = 'teahouse666'; // 授权登录的密码,即为QQ邮箱授权码
        private static $NICKNAME = 'test123'; // 发件人的昵称(QQ邮箱需在账号设置里单独设定)

        /**
         * QQMailer constructor.
         * @param bool $debug [调试模式]
         */
        //以上代码是调试时使用的,需要时删除注释符号即可
        public function __construct($debug = false)
        {
            $this->mailer = new PHPMailer();
           // $this->mailer->SMTPDebug = $debug ? 1 : 0;
            $this->mailer->isSMTP(); // 使用 SMTP 方式发送邮件
        }

        /**
         * @return PHPMailer
         */
        public function getMailer()
        {
            return $this->mailer;
        }

        private function loadConfig()
        {
            /* Server Settings  */
            $this->mailer->SMTPAuth = true; // 开启 SMTP 认证
            $this->mailer->Host = self::$HOST; // SMTP 服务器地址
            $this->mailer->Port = self::$PORT; // 远程服务器端口号
            $this->mailer->SMTPSecure = self::$SMTP; // 登录认证方式
            /* Account Settings */
            $this->mailer->Username = self::$USERNAME; // SMTP 登录账号
            $this->mailer->Password = self::$PASSWORD; // SMTP 登录密码
            $this->mailer->From = self::$USERNAME; // 发件人邮箱地址
            $this->mailer->FromName = self::$NICKNAME; // 发件人昵称(任意内容)
            /* Content Setting  */
            $this->mailer->isHTML(true); // 邮件正文是否为 HTML
            $this->mailer->CharSet = self::$CHARSET; // 发送的邮件的编码
        }

        /**
         * Add attachment
         * @param $path [附件路径]
         */
        //此部分为需发送附件时使用的代码,路径需要绝对路径。
        public function addFile($path)
        {
            $this->mailer->addAttachment($path);
        }


        public function send($email, $title, $content)
        {
            $this->loadConfig();
            $this->mailer->addAddress($email); // 收件人邮箱
            $this->mailer->Subject = $title; // 邮件主题
            $this->mailer->Body = $content; // 邮件信息
            return (bool)$this->mailer->send(); // 发送邮件
        }
    }
        echo "<script>alert('Send mail success, please check your email!')</script>"; //发送邮件后输出的提示框内容
        header("refresh:0.5;url=https://www.m78.co/"); //确认提示框后执行的代码
?>
2.设定邮件内容”sendmail.php”
<?php
    $mailto = $_POST['to']; //获得通过表单提交得到的收件地址
    if ($mailto == ''){
        header('Location: https://www.m78.co/');
    } //检验收件地址是否为空,否则跳回
    require_once 'QQMailer.php';
    // 实例化
    $mailer = new QQMailer(true);
    // 添加附件
    //$mailer->addFile('Happy the 70th National Day.png');
    // 邮件标题
    $title = '[Verify Okay!]Now Check it!';
    // 邮件内容
    $cont = <<< EOF
    Test123
    EOF;
    // 发送邮件
    $mailer->send($mailto, $title, $cont);
3.Form表单调用
<form method="post" action="./sendmail.php">
    Your Email:
    <br><input type="text" name="to">
    <br><input type="submit" width="20px" height=19px value="Submit"></input>
 </form>
闲言:
本模式为“表单发件”,表单提交后便会发送设定的邮件,如有需求可自行修改相应代码。
此外,
若邮件内容中含有$abc这种参数,想发送带参数邮件的方法请参见此篇文章:
© 版权声明
文章版权归作者所有,未经允许请勿转载。
THE END






![【Steam】主播女孩重度依赖 [NEEDY GIRL OVERDOSE] 离线正版 附带十项修改器、结局总览~星空小站](https://www.m78.co/wp-content/uploads/2022/02/503af1e8e3b2-1.png)


暂无评论内容